Python Landsat Tutorial
Requirements
This tutorial is designed to show how to work with Landsat 8 files in WASDI. Details of the Landsat 8 mission and/or guidelines on how to configure your own environment are out of the scope of this tutorial In this tutorial we use PyCharm as a free Python Development tool, but the code can be executed on every different Python environment.
Note
This tutorial requires gdal working in your python env: we know this can be tricky.
For Windows 10, we suggest following this tutorial:
https://opensourceoptions.com/blog/how-to-install-gdal-for-python-with-pip-on-windows/
The key is that here:
https://www.lfd.uci.edu/~gohlke/pythonlibs/#gdal
you can find different pre-build GDAL “images” that can be installed directly asking pip to use the file.
Overview
In this tutorial, we will learn how to work with Landsat 8 Images in WASDI. The tutorial will implement a processor that takes as input:
Name of a Landsat 8 file
List of Bands to extract, by default B5 and B4
Resolution to use
The processor will open the Landsat image, create a tiff with only the selected bands, reprojected to the desired resolution, and then it will calculate NDVI, assuming that the first extracted band is NIR and the second is RED.
The equation to compute NDVI is: [NIR-RED]/[NIR+RED].
Note
It is mandatory that at least 1 Landsat image is imported in the workspace (using the WASDI web interface, i.e. Search) BEFORE running this processor. Check Wasdi Web Platform access and basic usage for more general info on this.
Setup
Open PyCharm and start a new project.

Name it “Landsat8Tutorial” (or however you wish, just remember to be coherent). You may wish to create a new virtual environment or use an existing one. Uncheck the option for creating a “main.py” welcome script (or, at least, remember to delete it later on).
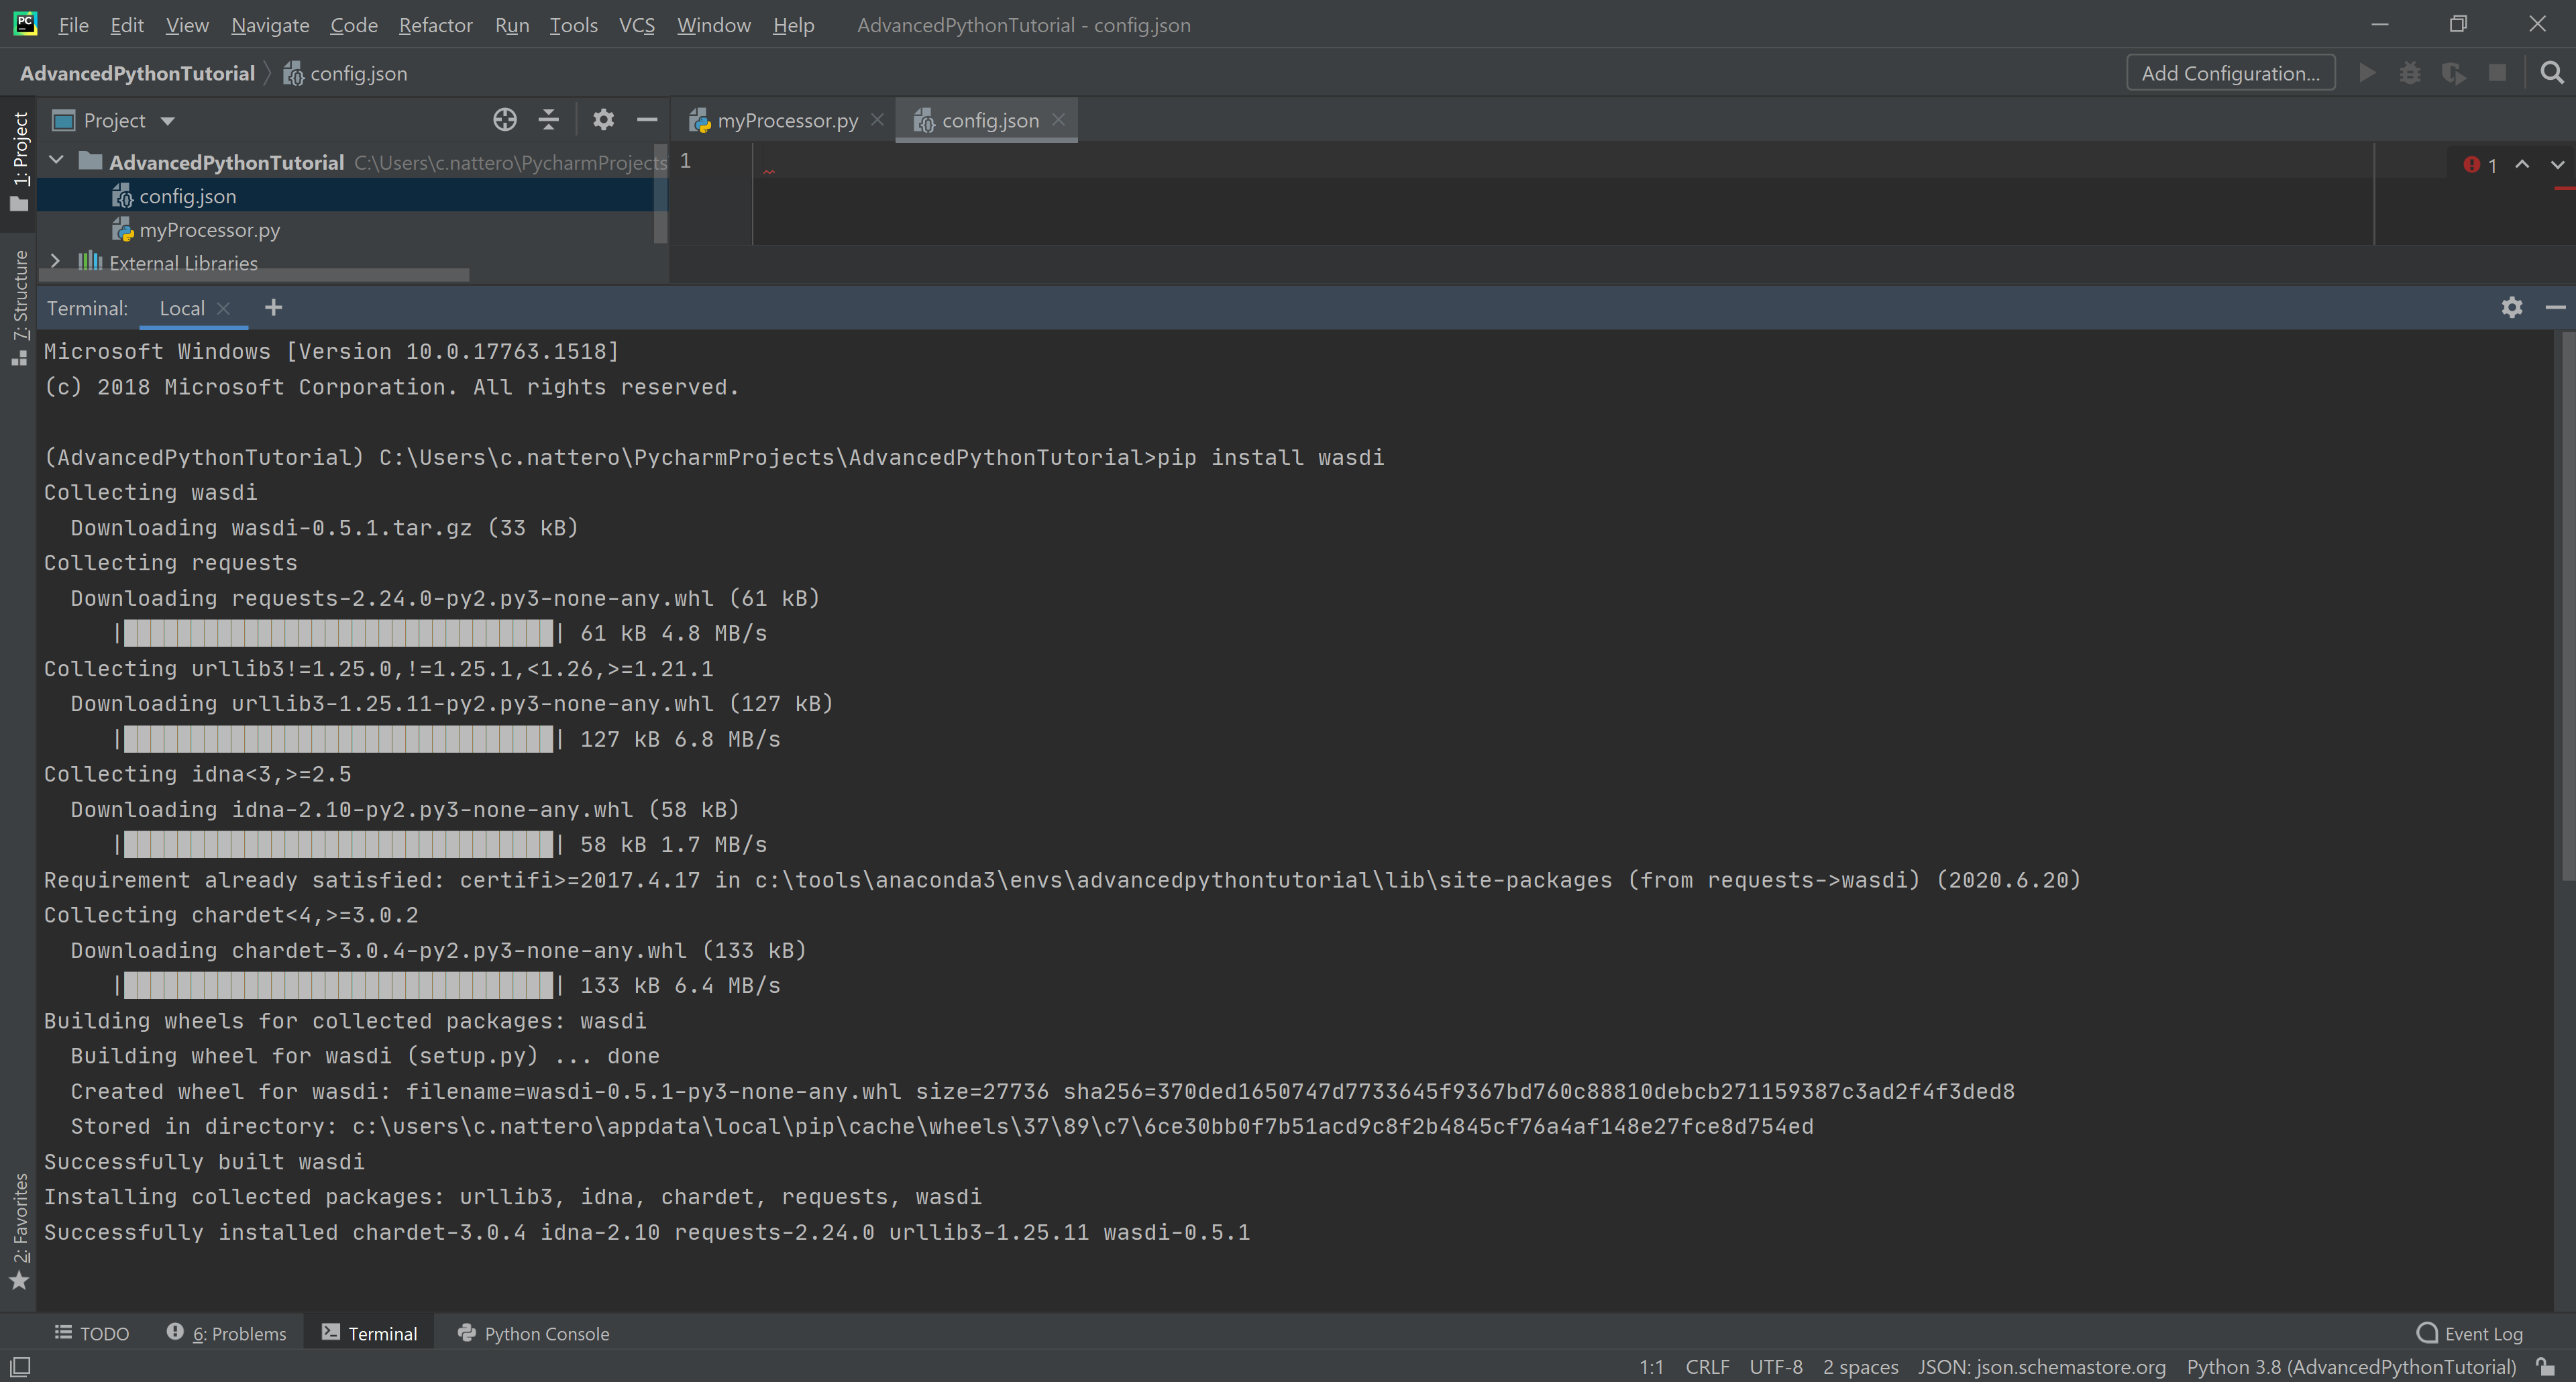
Let’s install the library we need. In the terminal write:
pip install wasdi
and hit enter
Note
Remember you need also to have gdal installed. If you previously installed wasdi, you may wish to update it by adding the –upgrade flag, i.e.:
pip install --upgrade wasdi
Create first files
Now we need to create these three fundamental files (right click on the Projec Icon, new -> …):
myProcessor.py: create a python file, then call it myProcessor.py
config.json: create a file, then call it config.json (PyCharm will recognize automatically it is a JSON file)
params.json: create a file, then call it params.json (PyCharm will recognize automatically it is a JSON file)
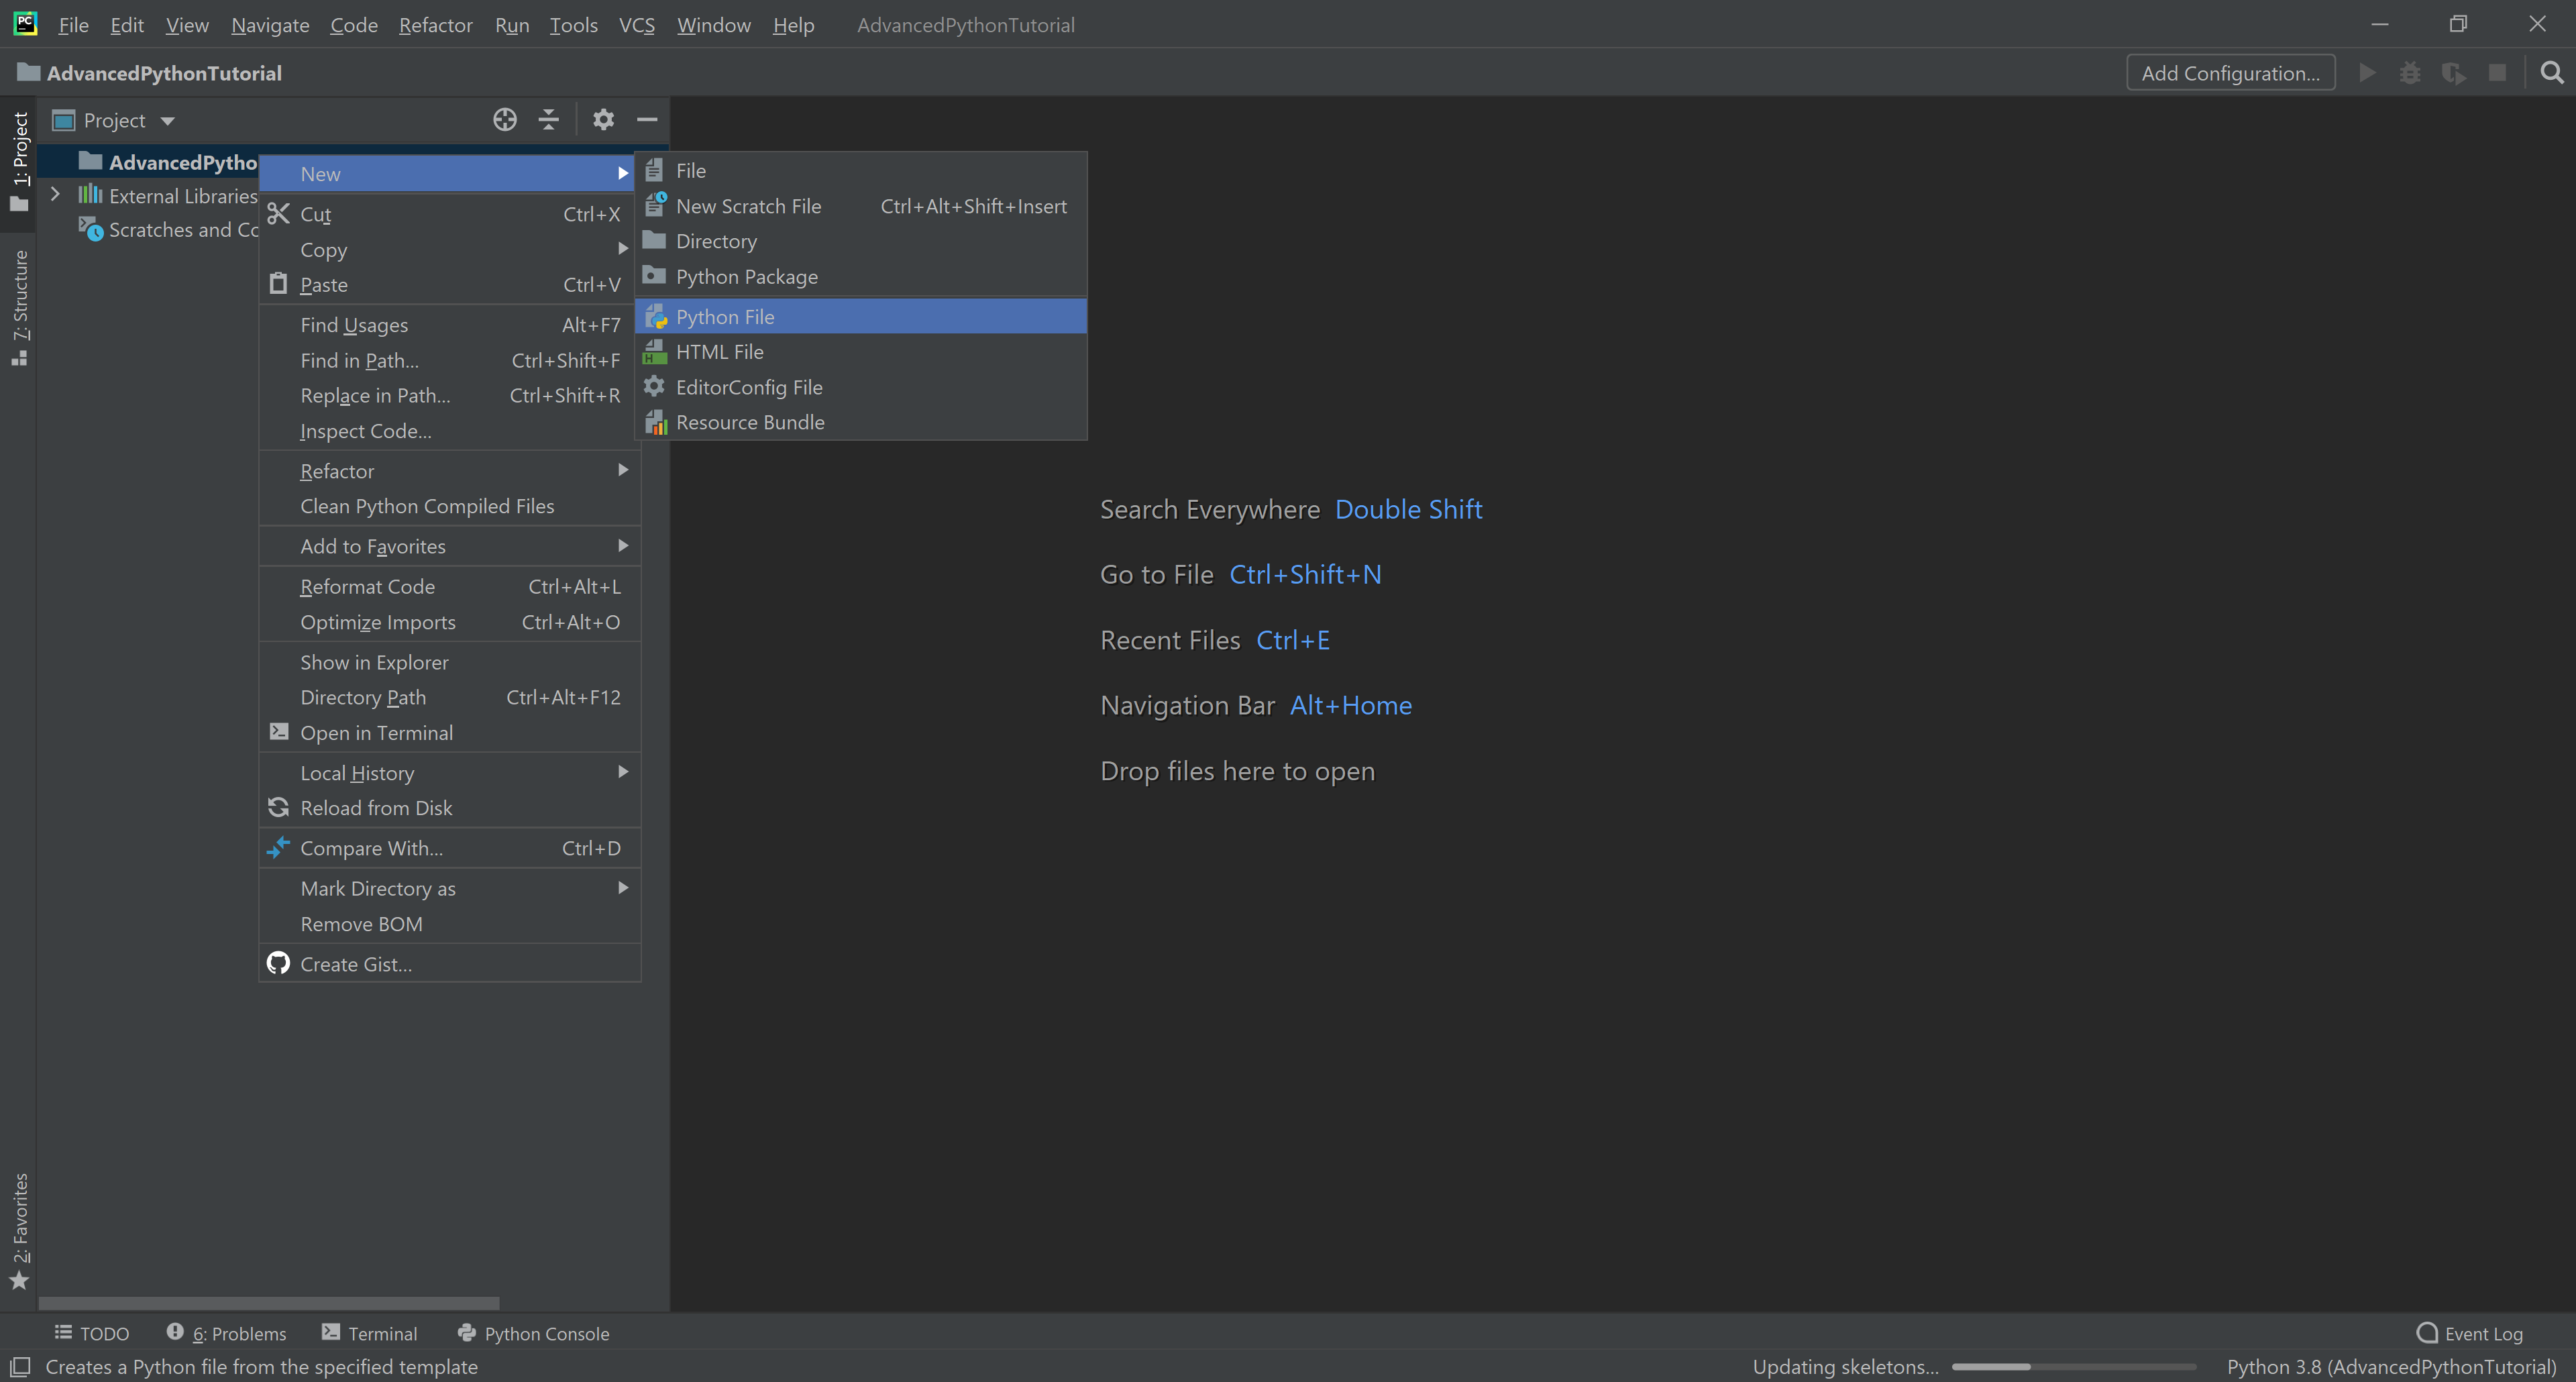
Create python file
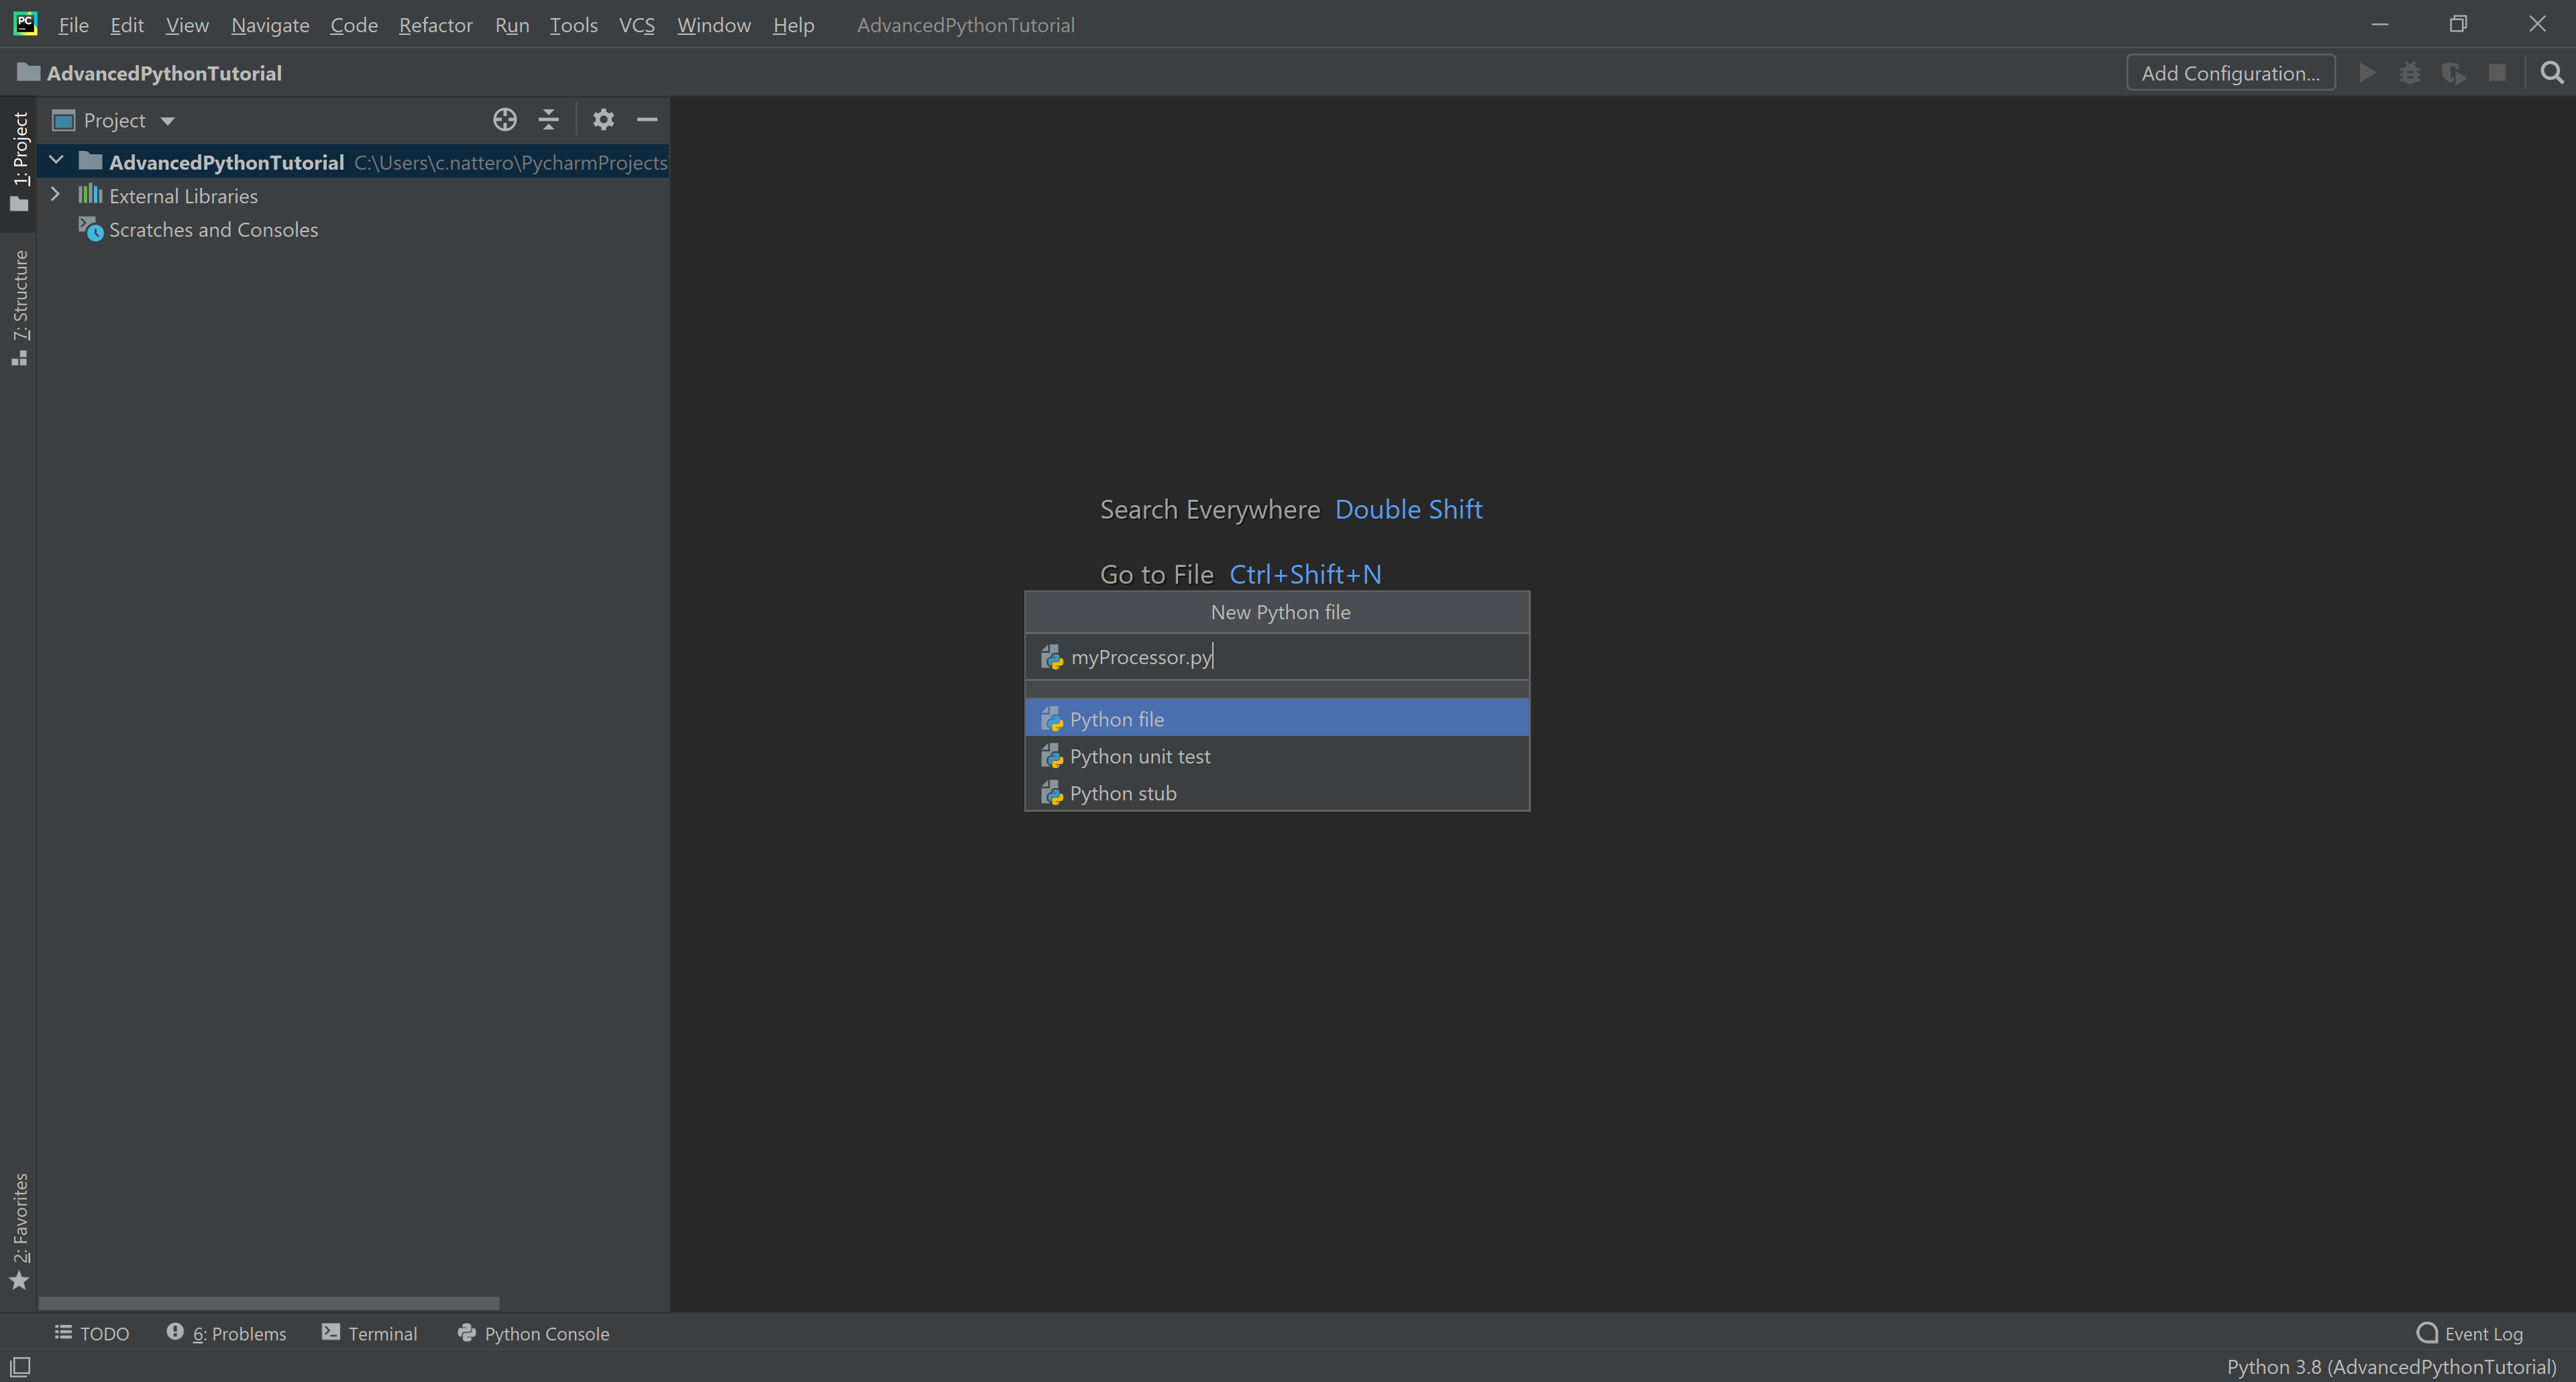
Call it myProcessor.py
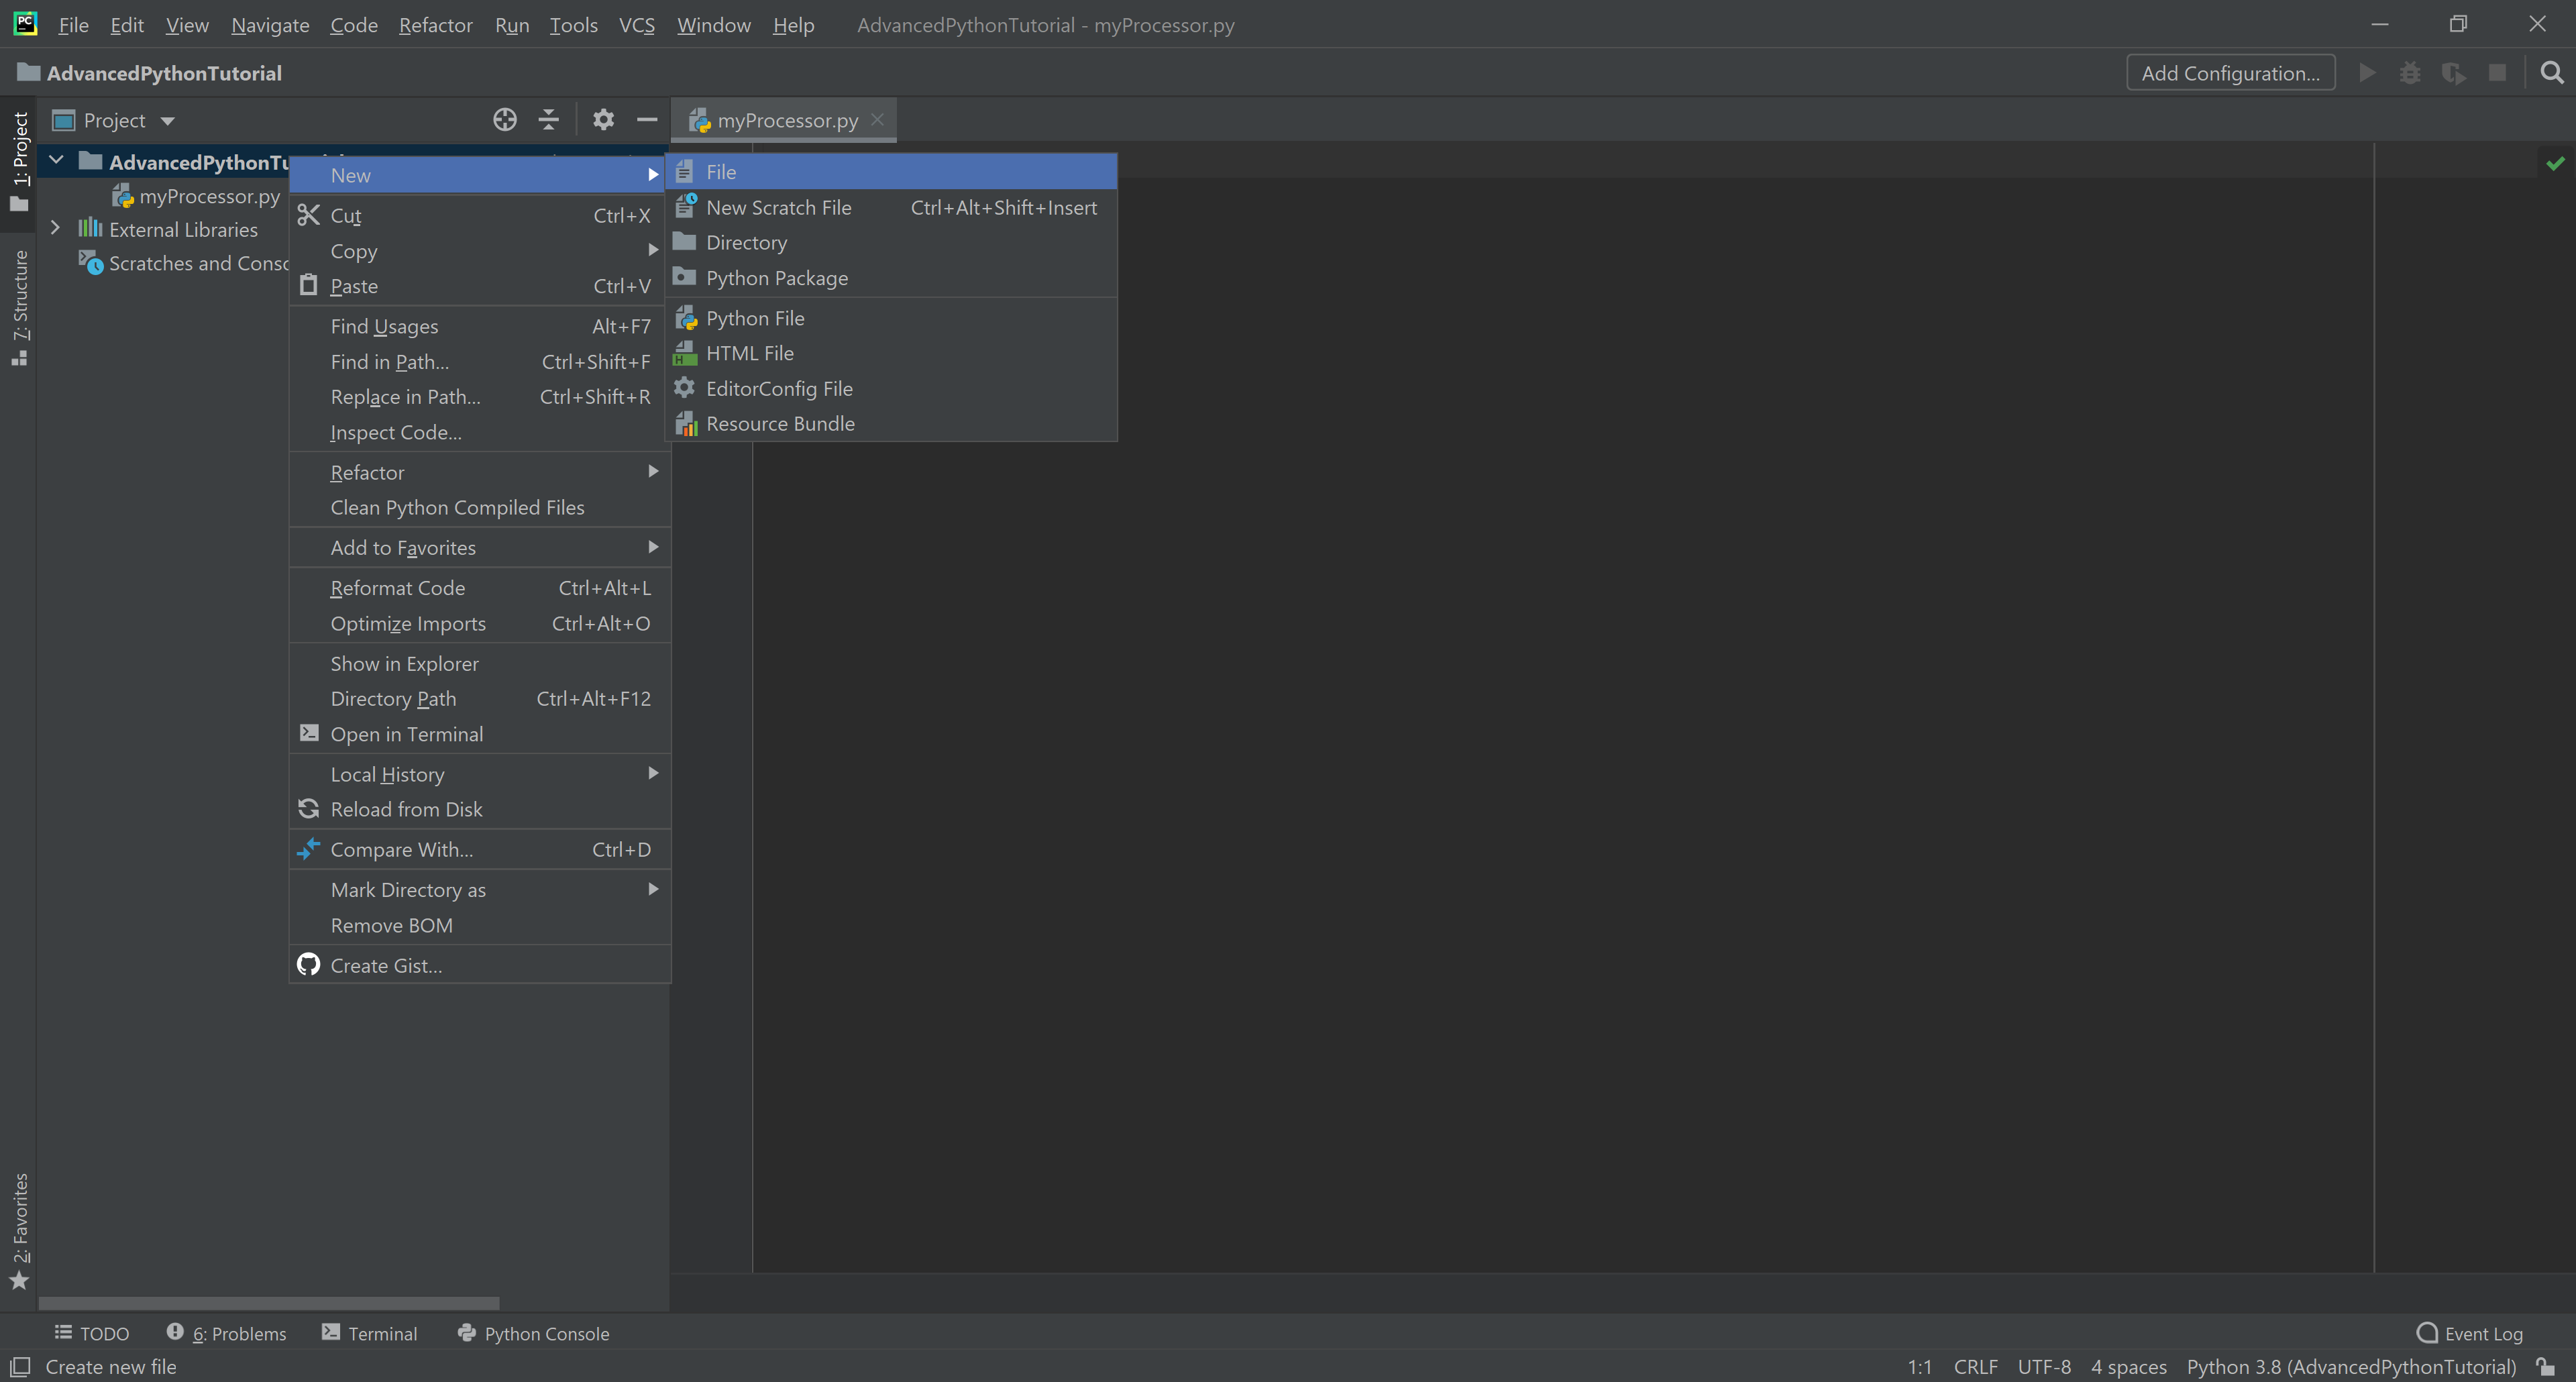
Create a json file
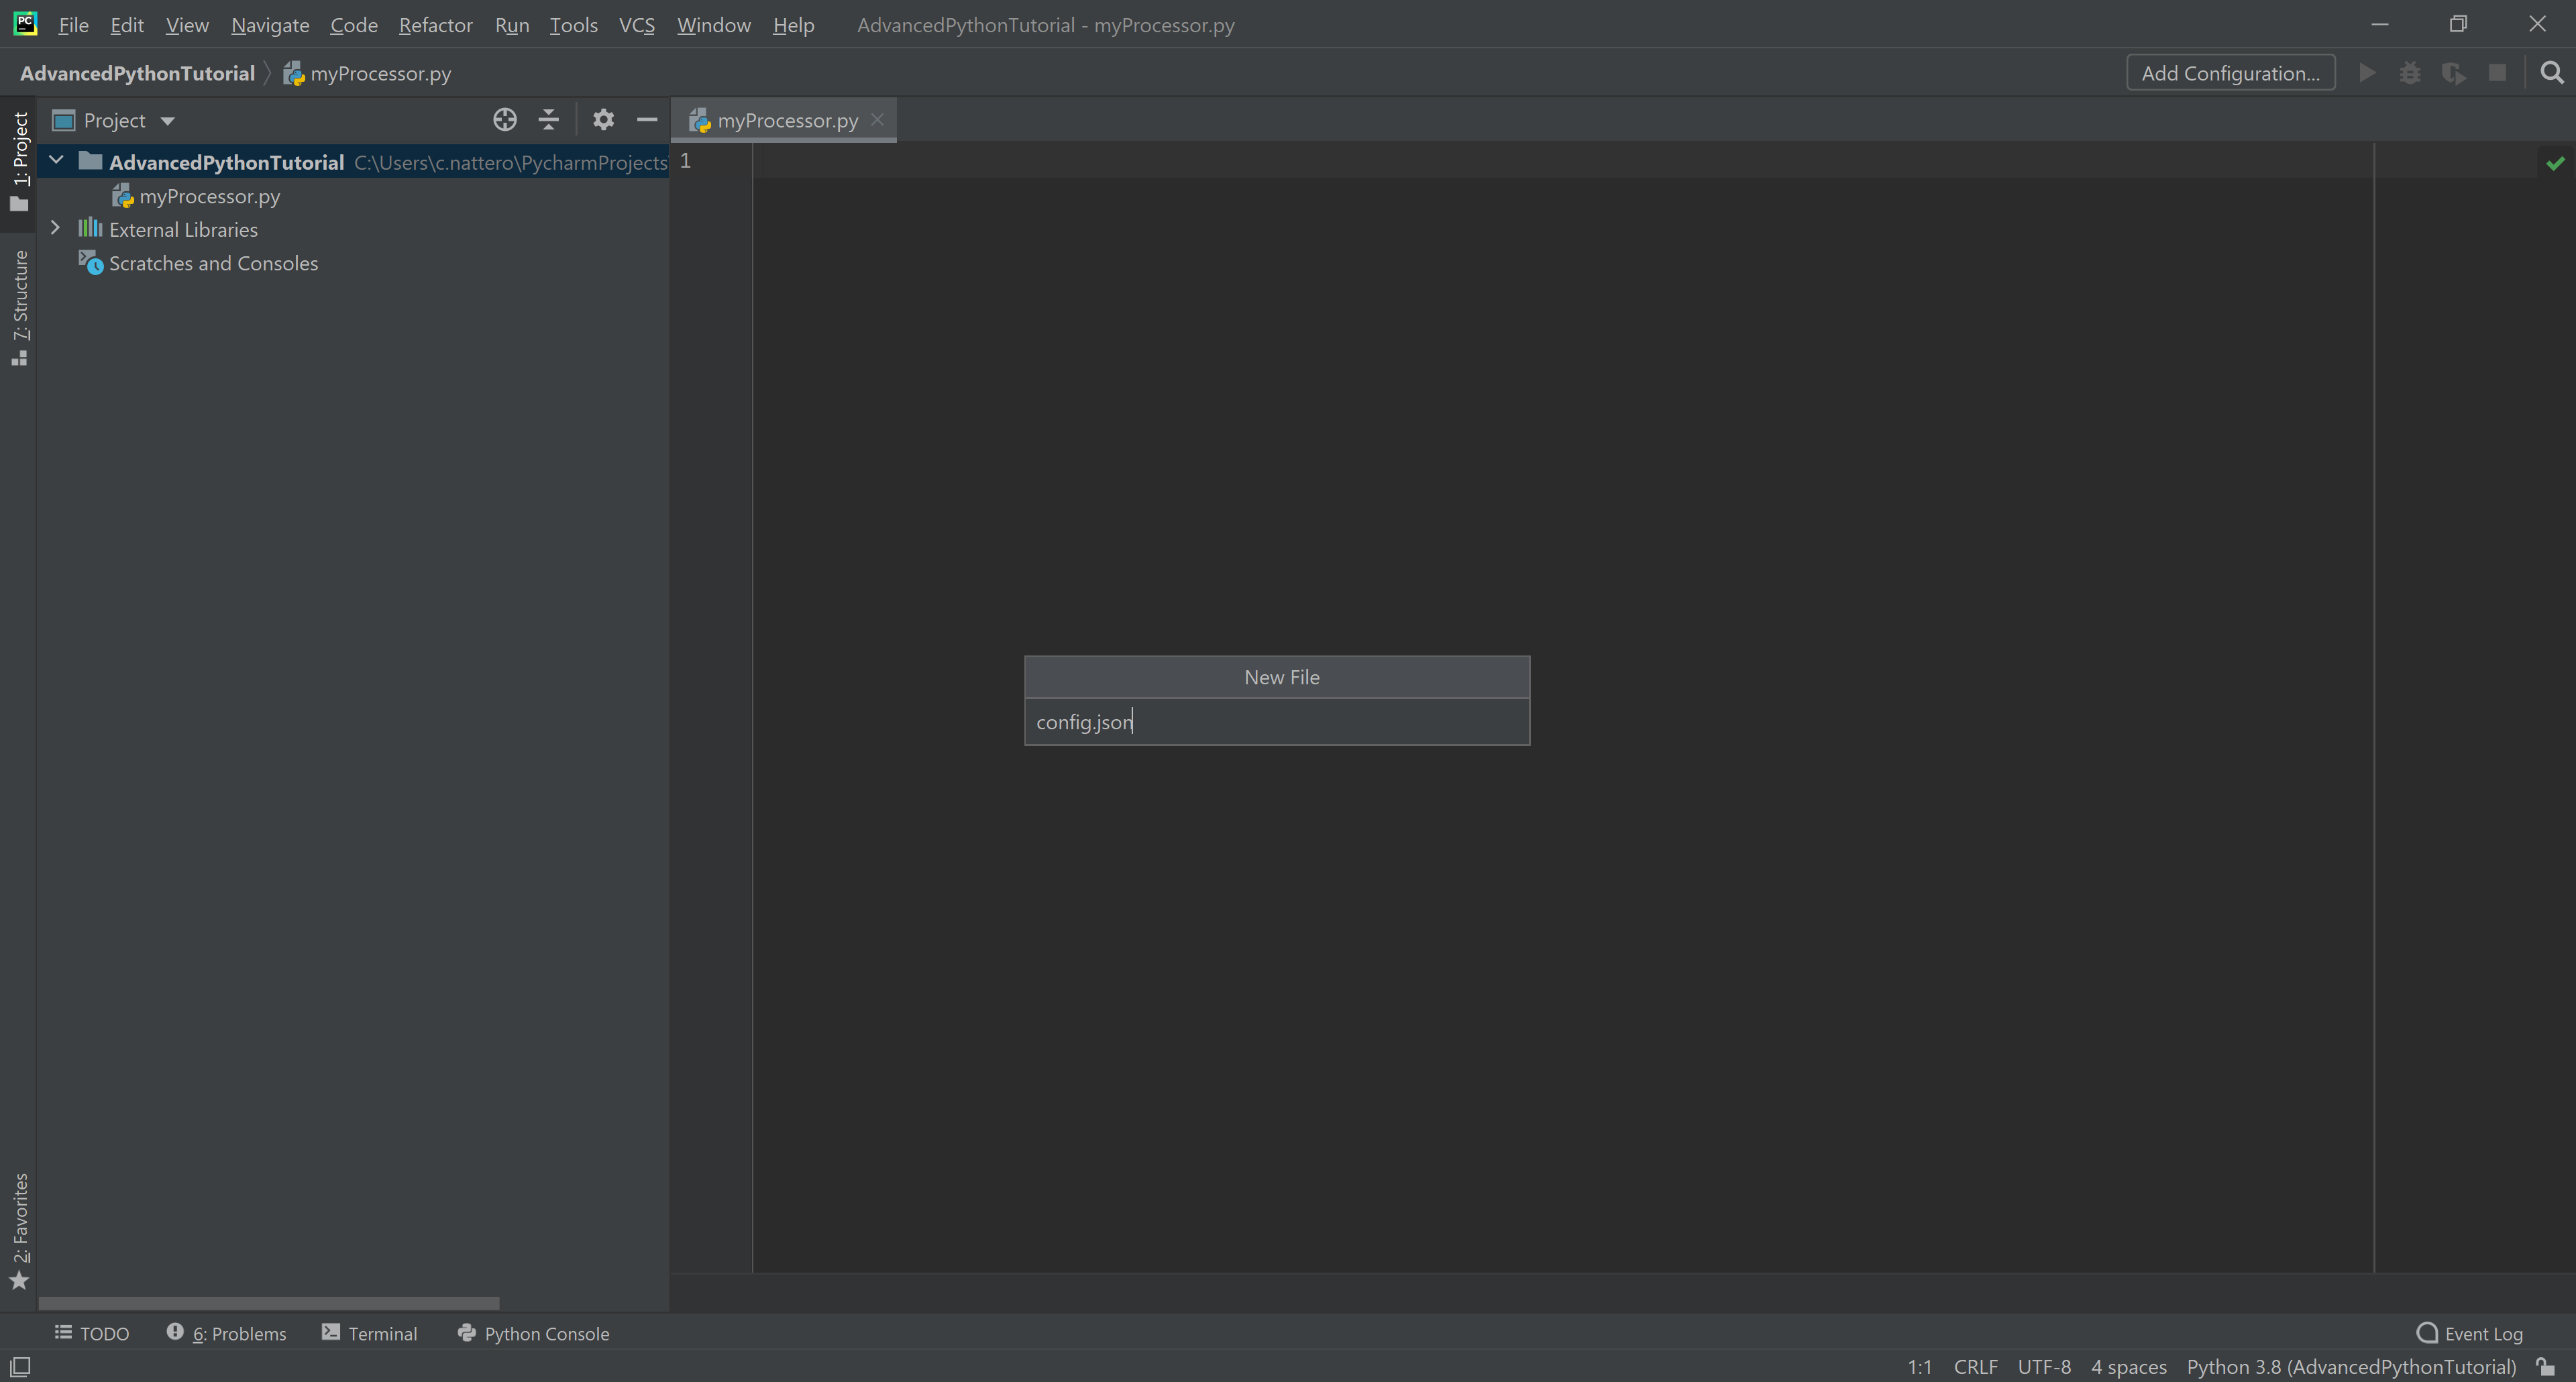
Call it config.json
Create a json file

Call it params.json
Next, point your browser to wasdi.net, log in, go in the Workspaces Section and create a new workspace. Call it “Landsat8Tutorial”.
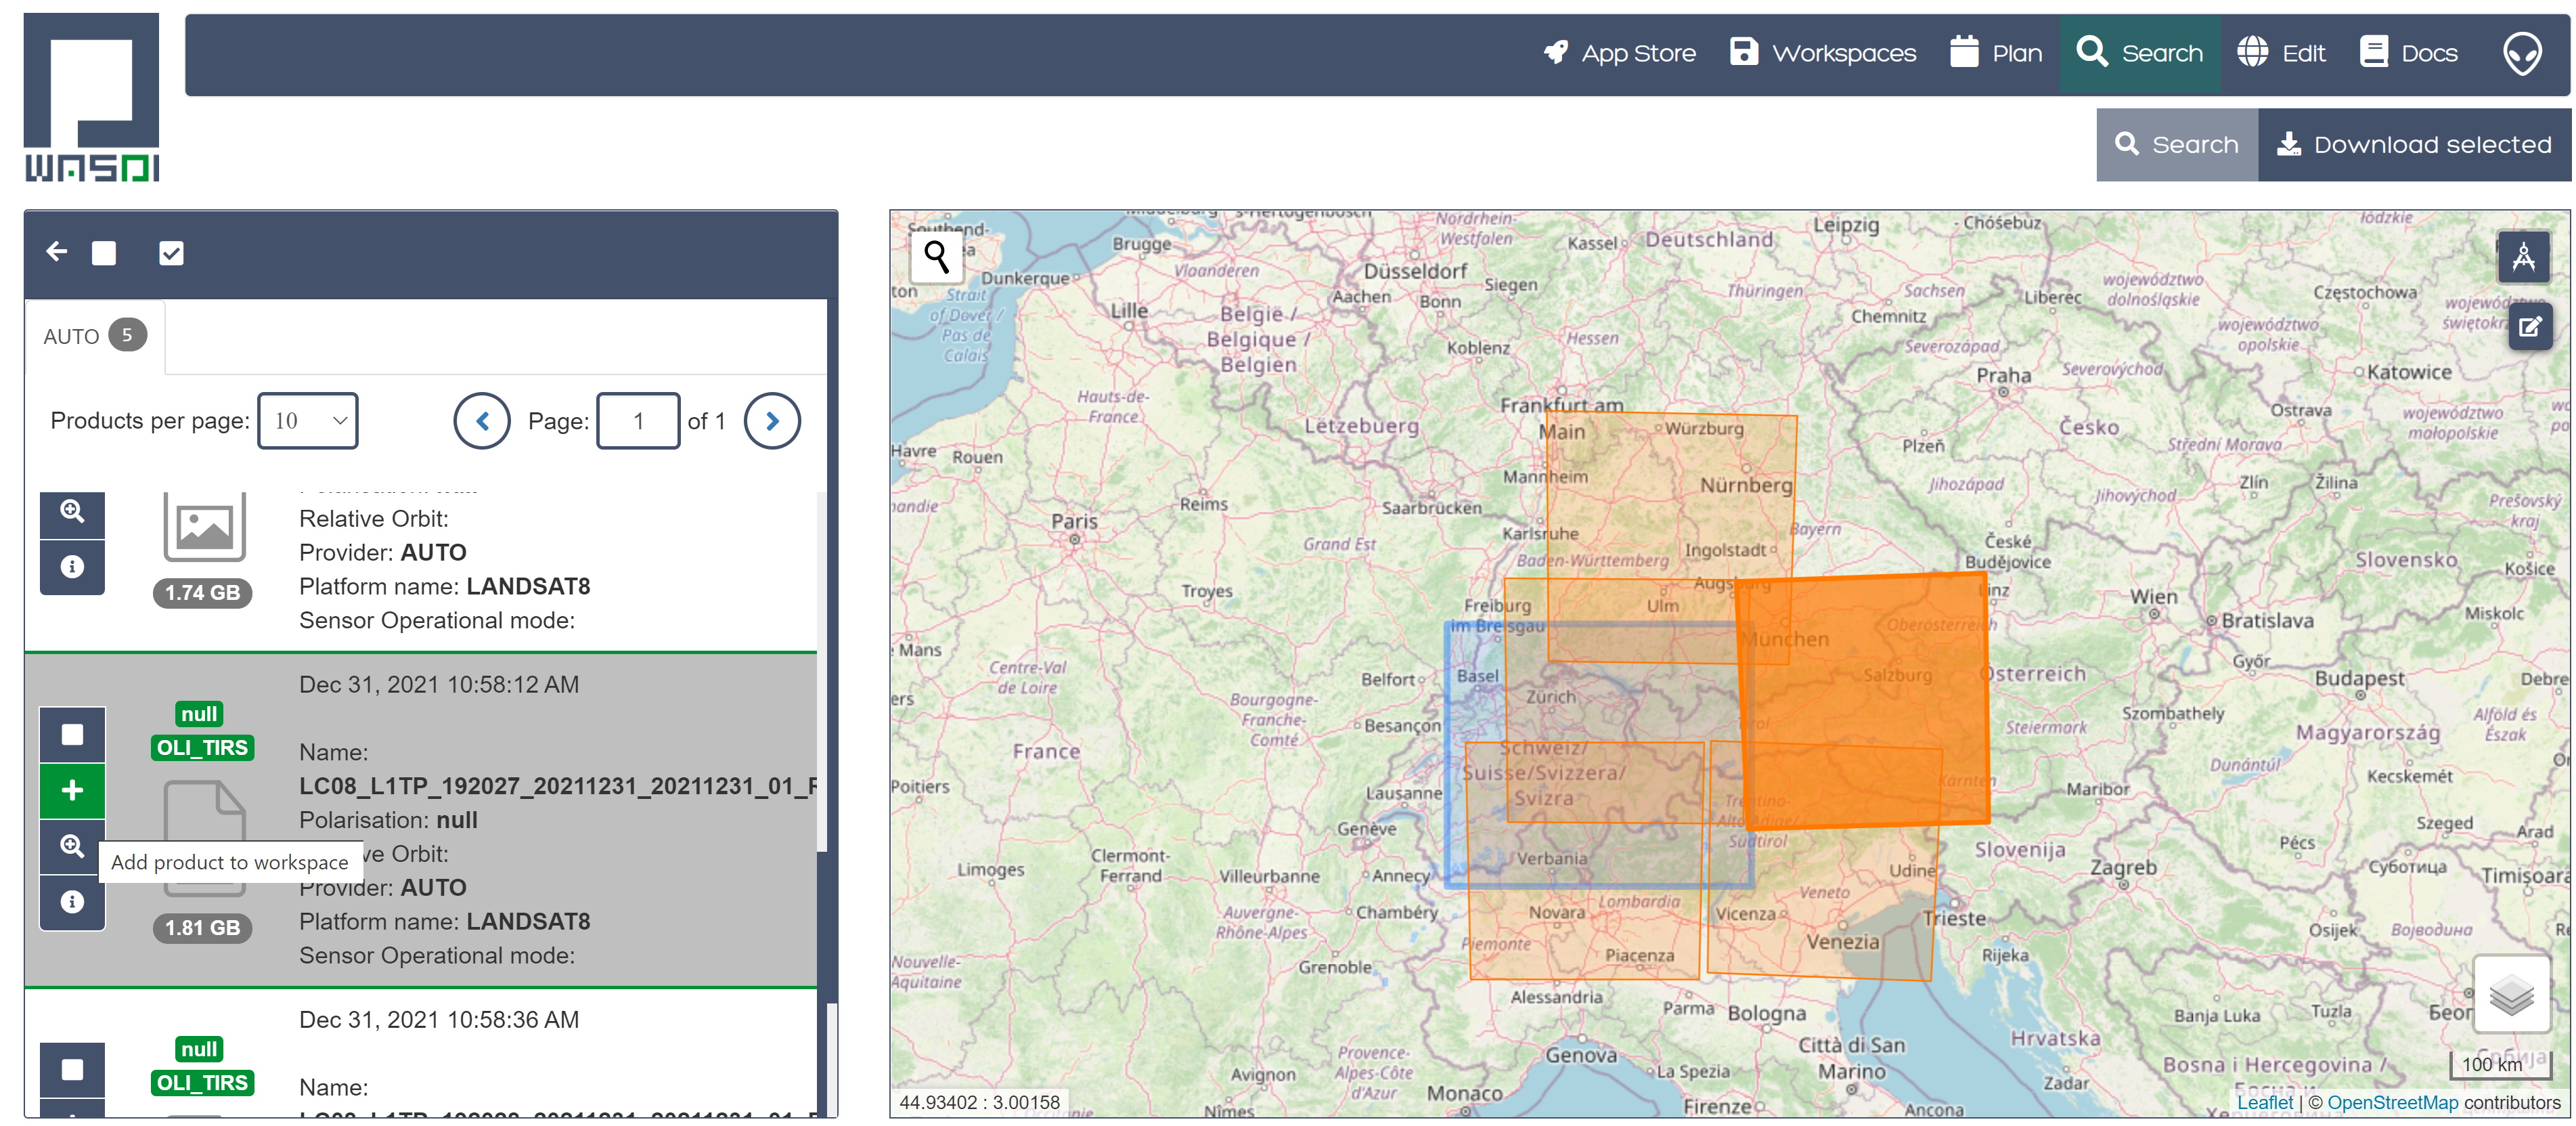
Go to the search section and select L8 data type and a bounding box in Europe

Select one image and click on the + button to add the image to the Landsat8Tutorial Wokspace
Come back to the edit section, and check that WASDI has been able to fetch the image.
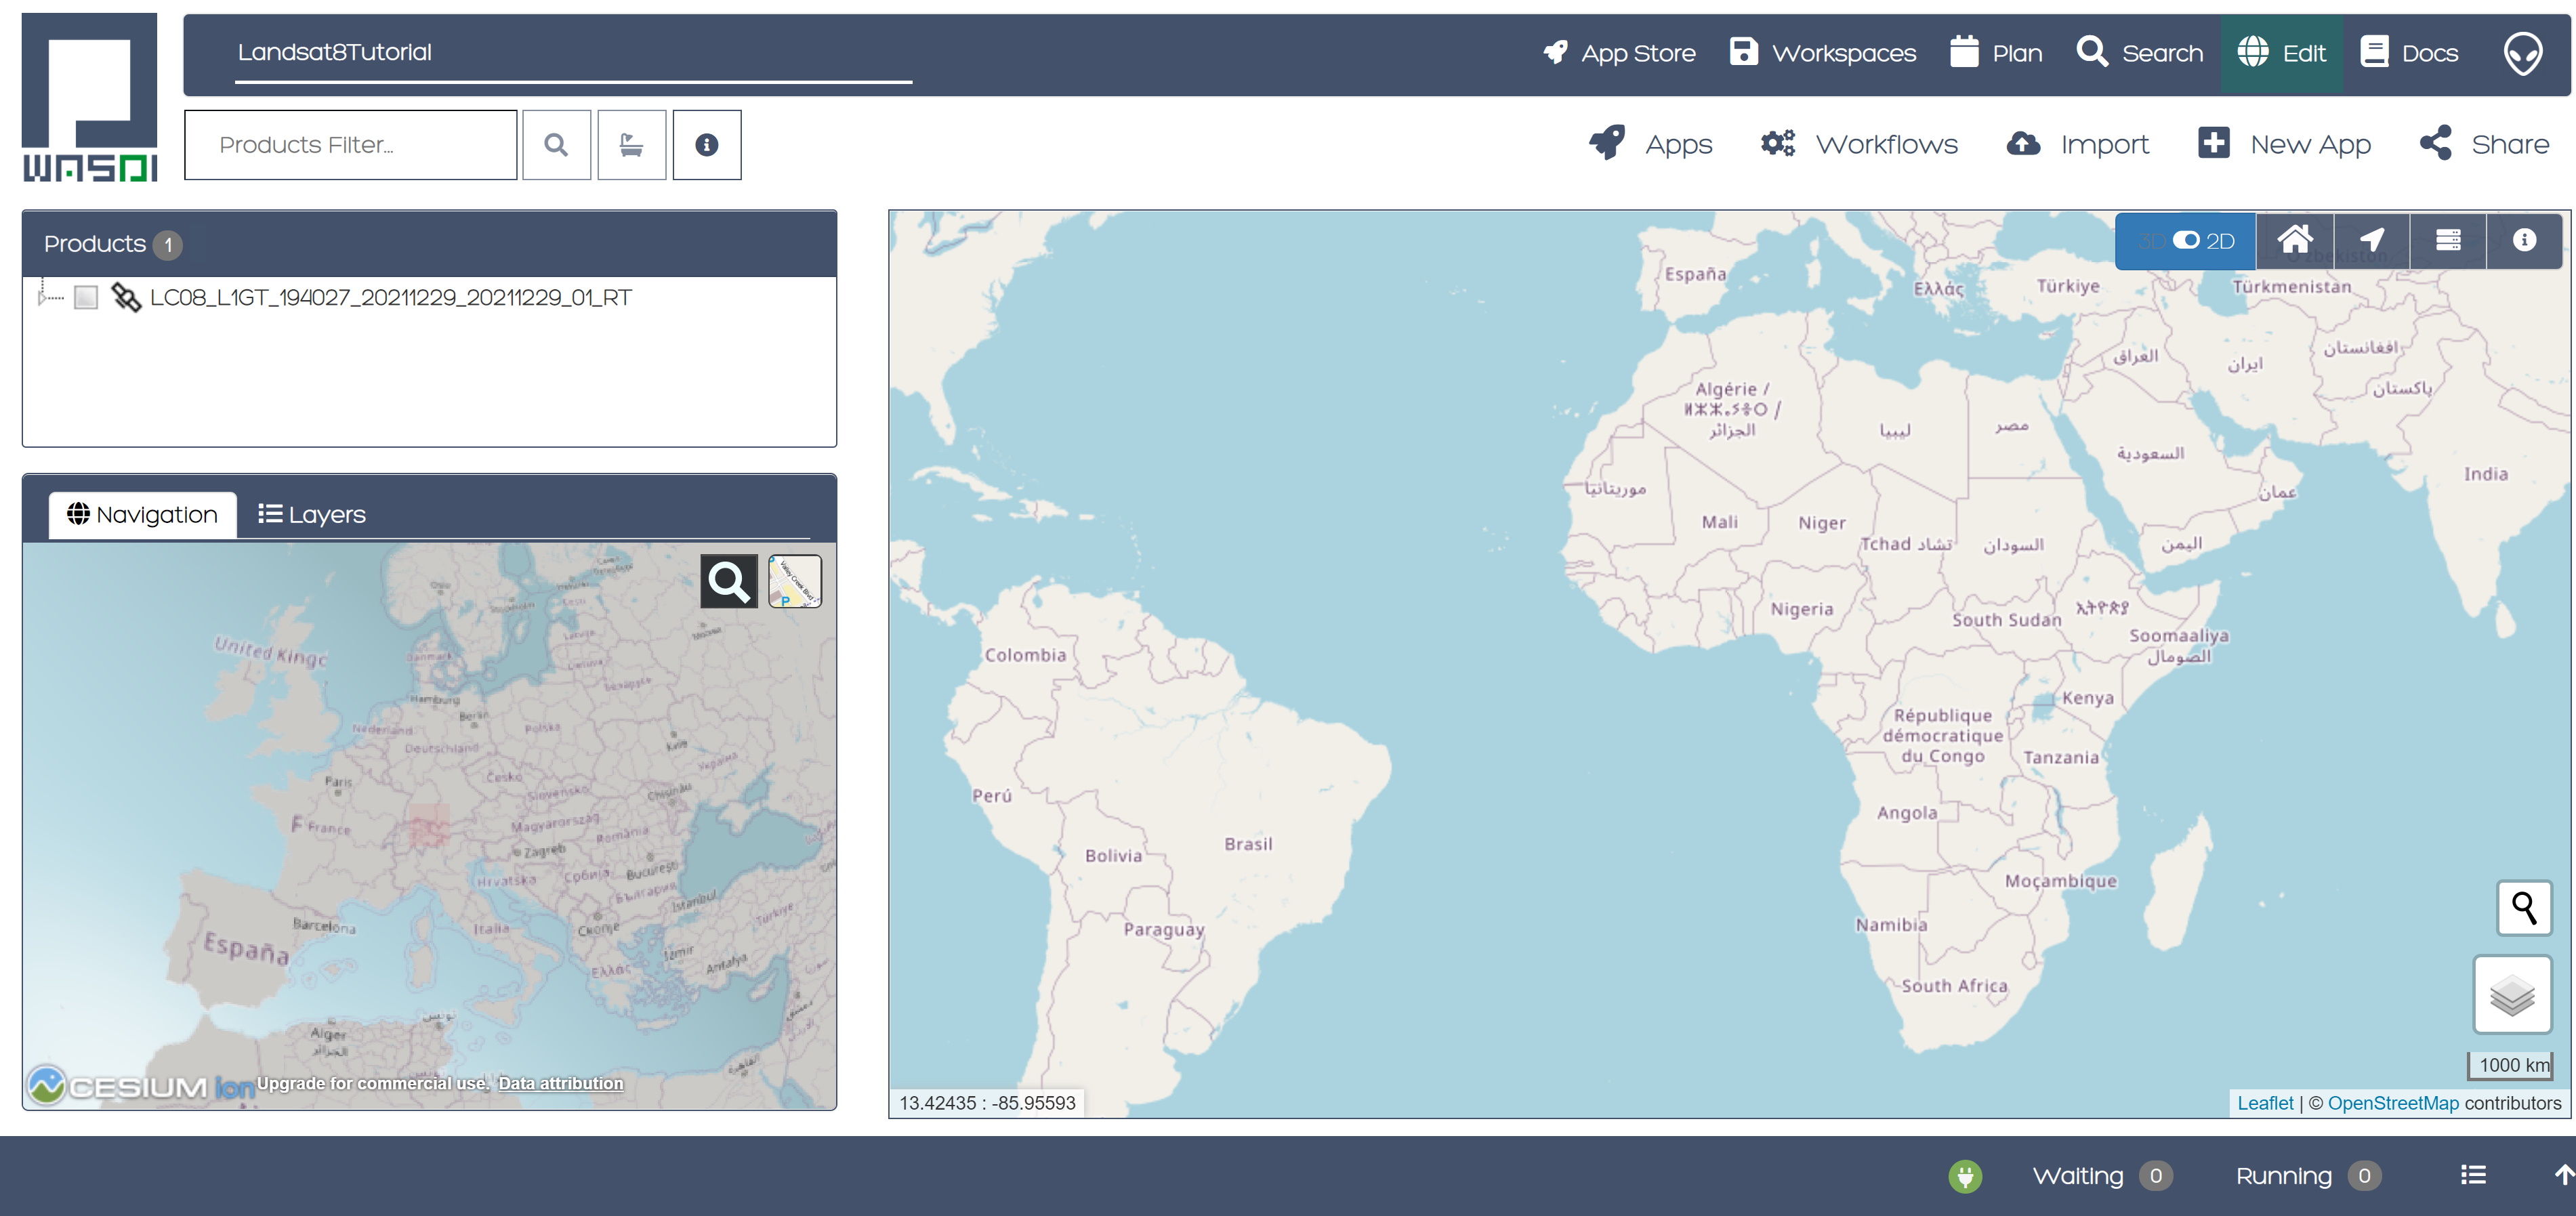
Take note of the file you imported, we will need it later. For this tutorial we assume:
LC08_L1GT_196029_20211227_20211227_01_RT
but this can be changed with any image you imported.
Leave the browser open on that page, we will need it later on.
First lines
Let’s begin by editing the config.json file. It is a JSON file, containing the user credentials and some fundamental parameters to get you started (see Wasdi Libraries Concepts):
{
  "USER": "your user name here",
  "PASSWORD": "your password here",
  "PARAMETERSFILEPATH": "./params.json"
  "WORKSPACE": "AdvancedTutorialTest"
}
Note
please, keep this file for yourself. You should never give this file to anyone else, and you do not need to upload to WASDI, as we’ll see later on. You just need this file in your project for working with the WASDI python library. Use this file to change the workspace where you want to work.
Let’s then edit params.json file. It is a JSON file that represents the inputs needed by our processor. The WASDI Developer can decide what parameters are needed; each parameter has a unique name within the processor. Each parameter can be of different types (i.e. Strings, Integers, Float, Arrays, Complex Objects…). params.json is where you declare and valorize your inputs. The same inputs will be avaiable in the WASDI Web Interface when publishing the processor.
{
  "BANDS": ["B5", "B4"],
   "RESOLUTION": "30",
   "L8FILE": "LC08_L1GT_196029_20211227_20211227_01_RT.zip"
}
Now, open myProcessor.py, create a main and a method called run. The latter is required for WASDI to work (more on that later on).
Note
- These are two requirements necessary to use WASDI:
have a python file called myProcessor.py
have a function called run() (no params) within myProcessor.py
After that, you can include as many python files as you need, regardless their organization in directories. You just need to have a myProcessor.py with a method run() as entry point.
The main method will initiate the WASDI library and call the run method:
import wasdi
def run():
pass
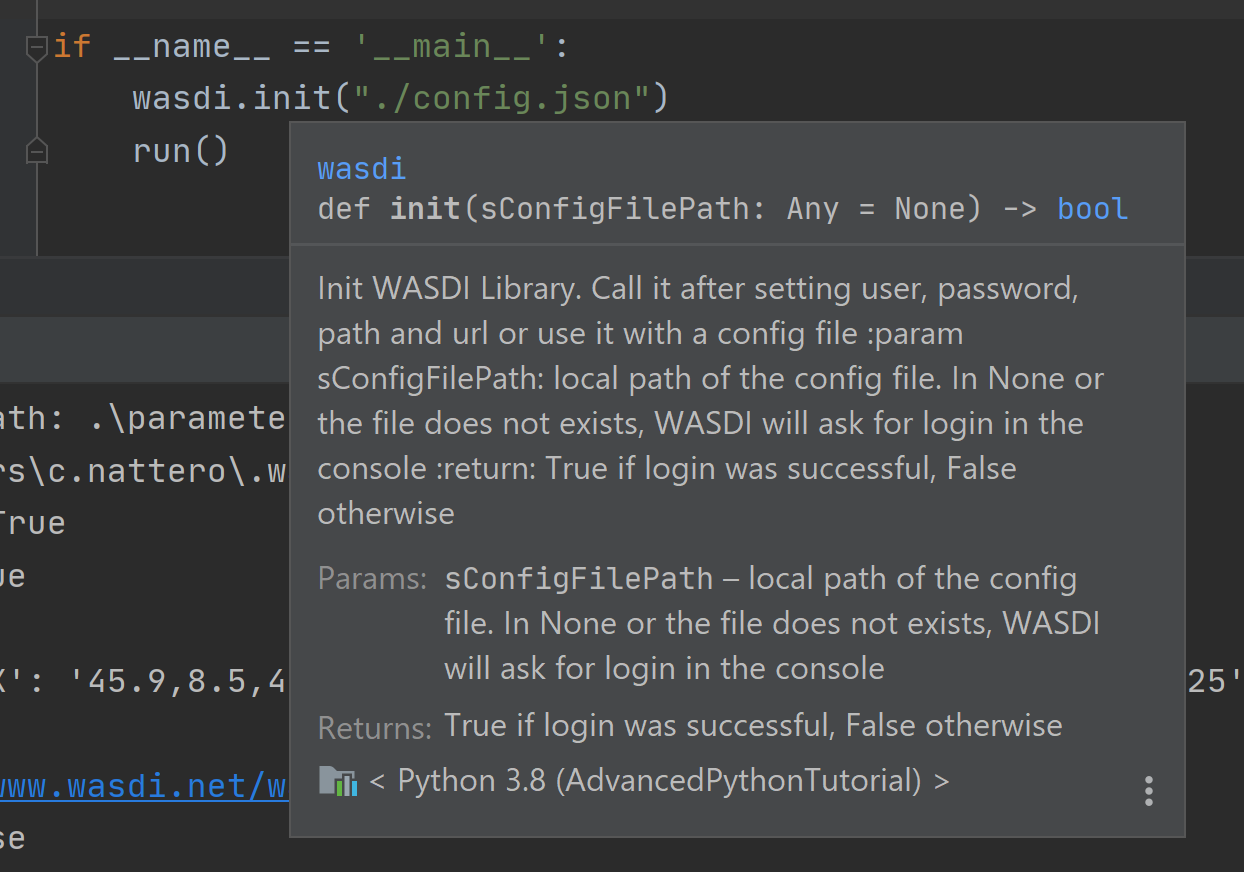
if __name__ == '__main__':
wasdi.init("./config.json")
run()
As you can see, we call wasdi.init and pass the relative path of the config file to it.
Let’s debug to see the effects of this.
Note
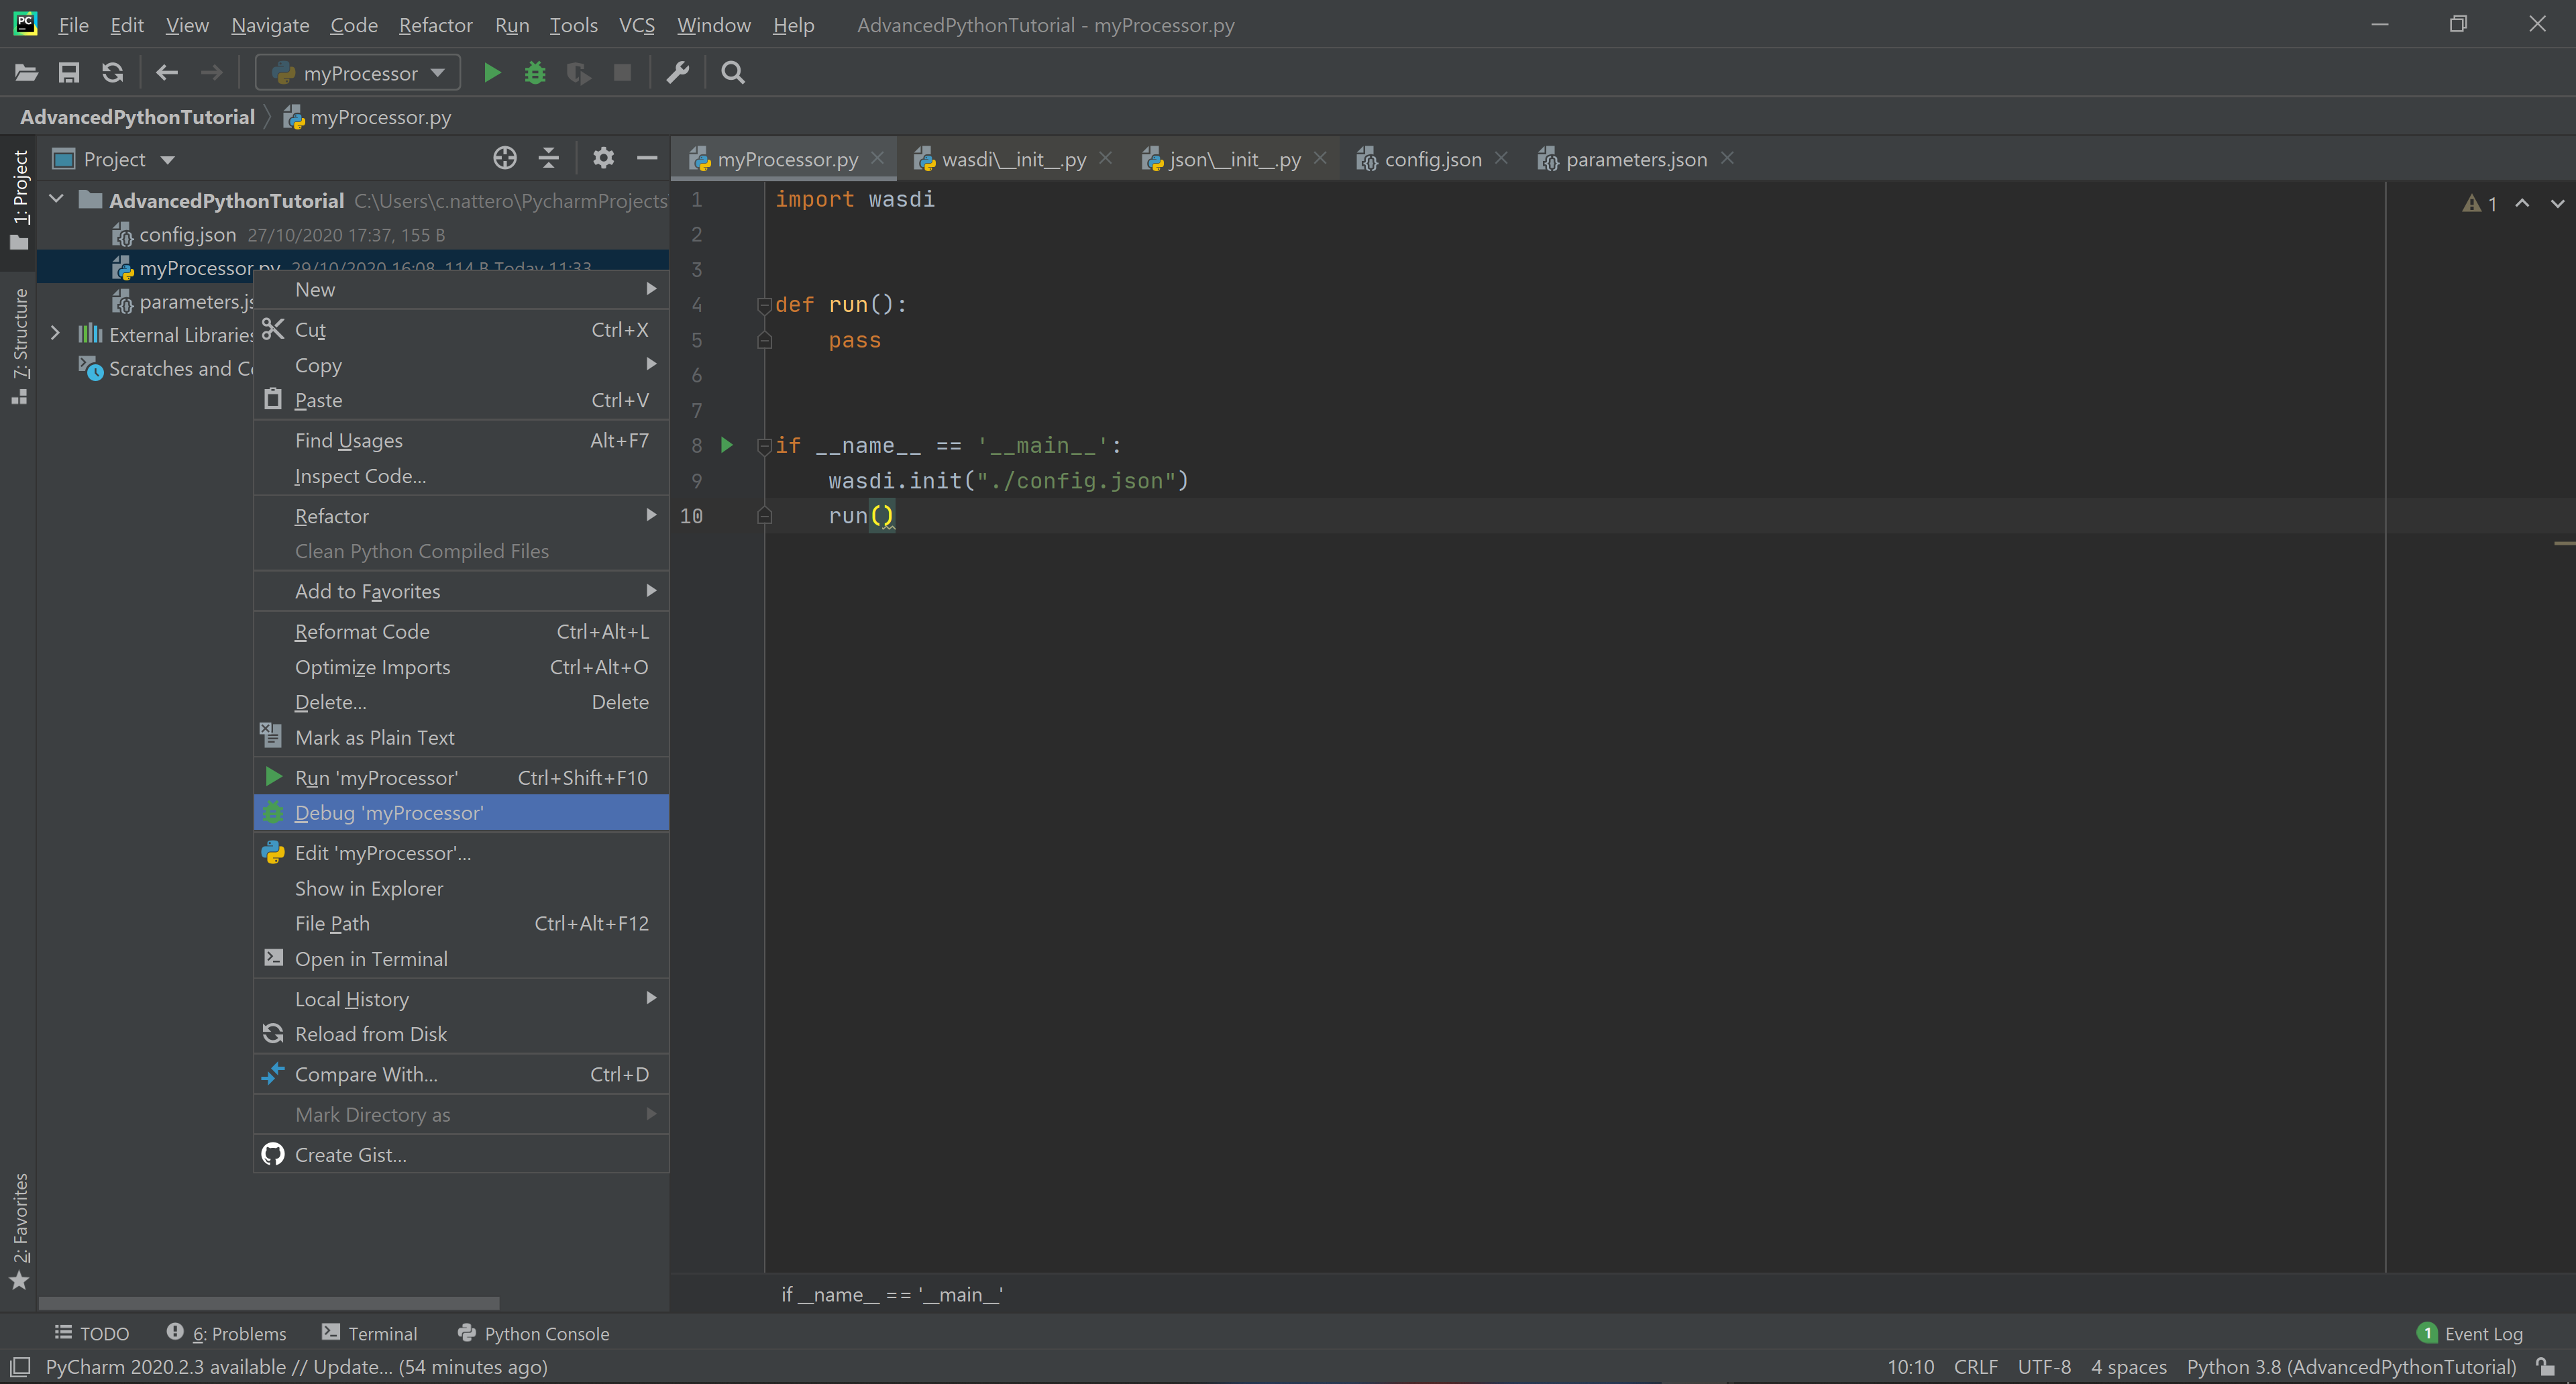
If a file main.py was created automatically for you, remember to define another debug configuration. The easiest way to do so is by right clicking on your code and select Debug ‘myProcessor.py’.
If the setup is correct so far, we should see the output from the wasdi library that shows the initialization has gone well. Something like this:
[INFO] _loadParams: wasdi could not load param file. That is fine, you can still load it later, don't worry
[INFO] waspy.init: returned session is: 0d3f3ef1-f4c3-4202-9015-6ca17fc21cc7
[INFO] waspy.init: WASPY successfully initiated :-)
[INFO] waspy.printStatus: user: username@email.address
[INFO] waspy.printStatus: password: ***********
[INFO] waspy.printStatus: session id: 0d3f3ef1-f4c3-4202-9015-6ca17fc21cc7
[INFO] waspy.printStatus: active workspace: 4f541d2c-4b29-445b-9869-9c8d185932ce
[INFO] waspy.printStatus: workspace owner: username@email.address
[INFO] waspy.printStatus: parameters file path: [...]/params.json
[INFO] waspy.printStatus: base path: C:\Users\username\.wasdi\
[INFO] waspy.printStatus: download active: True
[INFO] waspy.printStatus: upload active: True
[INFO] waspy.printStatus: verbose: True
[INFO] waspy.printStatus: param dict: {'BANDS': ['B5', 'B4'], 'RESOLUTION': '30', 'L8FILE': 'LC08_L1GT_196029_20211227_20211227_01_RT.zip'}
[INFO] waspy.printStatus: proc id:
[INFO] waspy.printStatus: base url: http://www.wasdi.net/wasdiwebserver/rest
[INFO] waspy.printStatus: is on server: False
[INFO] waspy.printStatus: workspace base url: http://www.wasdi.net/wasdiwebserver/rest
[INFO] waspy.printStatus: session is valid :-)
If you have the same situation, we are configured and ready to start!!
Extract Bands
The first step of our processor will be to extract the bands from the L8 image. WASDI ingest L8 images as a .zip file. Each .zip file contains different .tif images, one for each band, and some other files. We want to implement a function that takes as input the name of the L8 zip file, a list of bands, a resolution and that then creates a new .tif file with only the extracted bands at the desired resolution. The L8 bands are:
B1 - Coastal aerosol 30m
B2 - Blue 30m
B3 - Green 30m
B4 - Red 30m
B5 - Near Infrared (NIR) 30m
B6 - SWIR 1 30m
B7 - SWIR 2 30m
B8 - Panchromatic 15m
B9 - Cirrus 30m
B10 - Thermal Infrared (TIRS) 1 100m
B11 - Thermal Infrared (TIRS) 2 100m
Our function is implemented like this:
def extractBands(sFile, asBands, sResolution="30"):
   """
   Extracts some bands from the L8 zip file into a multiband tiff file at the specified resolution
    Bands are
    B1 - Coastal aerosol 30m
    B2 - Blue  30m
    B3 - Green 30m
    B4 - Red   30m
    B5 - Near Infrared (NIR) 30m
    B6 - SWIR 1 30m
    B7 - SWIR 2 30m
    B8 - Panchromatic 15m
    B9 - Cirrus 30m
    B10 - Thermal Infrared (TIRS) 1 100m
    B11 - Thermal Infrared (TIRS) 2 100m

    :param sFile: name of the Landsat 8 file
    :param asBands: array of string with the names of the bands to extract
    :param sResolution: resolution as a string is in meteres
    :return Returns the name of the new tiff file
   """

   # Output File Name that will be returned
   sOutputTiffFile = ""

   try:
       # Prepare the name a .vrt file that will be used to extract bands from the zip
       sOutputVrtFile = sFile.replace(".zip", ".vrt")
       # Prepare the name of the ouptut tif file
       sOutputTiffFile = sFile.replace(".zip", ".tif")

       # Get the Local Path of the input Landsat file
       sLocalFilePath = wasdi.getPath(sFile)

       # Get the path of the output files
       sOutputVrtPath = wasdi.getPath(sOutputVrtFile)
       sOutputTiffPath = wasdi.getPath(sOutputTiffFile)

       # Prepare an array of bands called BXX.TIF
       asBandsTiff = [b + '.TIF' for b in asBands]

       # Open the zip file
       with zipfile.ZipFile(sLocalFilePath, 'r') as zf:
           # Get all the files in the zip
           asZipNameList = zf.namelist()
           # Take from the files in the zip, the ones that match the BXX.TIF naming schema we are searching
           asBandsL8 = [name for name in asZipNameList for band in asBandsTiff if band in name]

           # Create the zip path of the files we want to extract
           asBandsZip = ['/vsizip/' + sLocalFilePath + '/' + band for band in asBandsL8]

           # Create an array that has the names of the files to extract in the order required by the asBands array in input
           asOrderedZipBands = []

           for sBand in asBands:
               for sZipBand in asBandsZip:
                   if sBand in sZipBand:
                       asOrderedZipBands.append(sZipBand)
                       break

           # Let gdal build a virtual file with our bands
           gdal.BuildVRT(sOutputVrtPath, asOrderedZipBands, separate=True)

           # Convert the vrt in tif with option  -tr sResolution sResolution to have all bands at the same res (ie -tr 30 30 to have at 30 meters)
           gdal.Translate(sOutputTiffPath, sOutputVrtPath, options="-tr " + sResolution + " " + sResolution)

           # we can remove the vrt file
           os.remove(sOutputVrtPath)
   except Exception as oEx:
       wasdi.wasdiLog("extractBands EXCEPTION")
       wasdi.wasdiLog(repr(oEx))
       wasdi.wasdiLog(traceback.format_exc())
   except:
       wasdi.wasdiLog("extractBands generic EXCEPTION")

   # Return the output file name
   return sOutputTiffFile
Compute NDVI
The second step is to compute the NDVI starting for our extracted Tif file. To compute NDVI we need to access the NIR and RED bands and compute the formula: NDVI = NIR-RED/NIR+RED
def computeNDVI(sTiffFile, sNDVIOutputFile):
    """
    Compute ndvi assuming that in sTiffPath there is as band 1 NIR and band 2 RED
    :param sTiffFile: name of the input tiff file
    :param sNDVIOutputFile: name of the ouput file with ndvi
    :return: full path of sNDVIOutputFile
    """

    # Open the tiff file: we assume it has two bands
    oDataset = gdal.Open(wasdi.getPath(sTiffFile))

    if not oDataset:
        wasdi.wasdiLog("Impossible to get Dataset from " + sTiffFile)
        return ""

    # Get the dimension of the bands in input
    [iCols, iRows] = oDataset.GetRasterBand(1).ReadAsArray().shape
    # Create gdal GeoTiff driver
    oDriver = gdal.GetDriverByName("GTiff")
    # Create a new Ouput file, same dimension of the input, compressed and with type float32.
    oOutDataFile = oDriver.Create(wasdi.getPath(sNDVIOutputFile), iRows, iCols, 1, gdal.GDT_Float32, ['COMPRESS=LZW', 'BIGTIFF=YES'])

    # set to the output same geotransform as input
    oOutDataFile.SetGeoTransform(oDataset.GetGeoTransform())
    # set to the output same projection as input
    oOutDataFile.SetProjection(oDataset.GetProjection())

    # We assume NIR = band1, RED = band2
    oNIR = oDataset.GetRasterBand(1)
    oRED = oDataset.GetRasterBand(2)

    # Convert the band values in a numpy array
    adNIRBandArray = numpy.array(oNIR.ReadAsArray())
    adREDBandArray = numpy.array(oRED.ReadAsArray())
    # Force data to be float
    adNIRBandArray = adNIRBandArray.astype(float)
    adREDBandArray = adREDBandArray.astype(float)
    # Compute NDVI formula, where is not nan
    adNDVIBandArray = numpy.where((adNIRBandArray + adREDBandArray!=0), (adNIRBandArray-adREDBandArray)/(adNIRBandArray+adREDBandArray), 0)

    # Write the new calulated NDVI to ouput file band 1
    oOutDataFile.GetRasterBand(1).WriteArray(adNDVIBandArray)
    # We assume 0 as no data
    oOutDataFile.GetRasterBand(1).SetNoDataValue(0)

    # saves to disk!!
    oOutDataFile.FlushCache()
    wasdi.wasdiLog("Saved " + sNDVIOutputFile)

    # Clean memory
    oNIR = None
    oRED = None

    # Return the name of our NDVI create file
    return sNDVIOutputFile
This tutorial shows an NDVI as a sample, but is clear that with this technique you can manipulate L8 data to fit your needs.
Main Function
Now the main operations are ready, we just need to put it all togheter.
def run():
    wasdi.wasdiLog("Landsat tutorial v.1.0")

    # Read from params the bands we want to extract and the resolution
    asBands = wasdi.getParameter("BANDS", ["B5", "B4"])
    sResolution = wasdi.getParameter("RESOLUTION", "30")
    sL8File = wasdi.getParameter("L8FILE", "LC08_L1GT_196029_20211227_20211227_01_RT.zip")

    # Call extract bands
    sTiffFile = extractBands(sL8File, asBands, sResolution)

    # Prepare the output NDVI name
    sNDVIFile = sTiffFile.replace(".tif", "_NDVI.tif")

    # Call compute NDVI
    computeNDVI(sTiffFile, sNDVIFile)

    # Add the file to the WASDI workspace
    wasdi.addFileToWASDI(sNDVIFile, "NDVI")
You can now test your processor. Remember that, at the first time you will debug it locally, WASDI will take some time to download for you the L8 file you are using. All is done automatically and only once, when needed.
In the same way, when you add the file to WASDI, the lib will updload for your result to the cloud:
[INFO] waspy._internalAddFileToWASDI( LC08_L1GT_196029_20211227_20211227_01_RT_NDVI.tif, False )
[INFO] waspy._internalAddFileToWASDI: remote file is missing, uploading
upload LC08_L1GT_196029_20211227_20211227_01_RT_NDVI.tif
uploadFile: uploading file to wasdi...
uploadFile: upload complete :-)
[INFO] waspy._internalAddFileToWASDI: file uploaded, keep on working!
[INFO] Running Locally, will not update status on server
Now that the core of our processor is done, lets make it a little bit more WASDI-integrated. We want to give some feedback to the user while the app is runnig and we do this using:
wasdi.wasdiLog: locally just a print to console, when on the server, it sends the logs to the web user interface
wasdi.updateProgressPerc: when on the server, updates the progress bar of the processor
wasdi.setPayload: allows to save a user-defined object associated to the processor run
def run():
    wasdi.wasdiLog("Landsat tutorial v.1.0")

    # Read from params the bands we want to extract and the resolution
    asBands = wasdi.getParameter("BANDS", ["B5", "B4"])
    sResolution = wasdi.getParameter("RESOLUTION", "30")
    sL8File = wasdi.getParameter("L8FILE", "LC08_L1GT_196029_20211227_20211227_01_RT.zip")

    wasdi.wasdiLog("Calling extract bands")
    # Call extract bands
    sTiffFile = extractBands(sL8File, asBands, sResolution)

    wasdi.updateProgressPerc(30)
    wasdi.wasdiLog("Calculating NDVI")

    # Prepare the output NDVI name
    sNDVIFile = sTiffFile.replace(".tif", "_NDVI.tif")

    # Call compute NDVI
    computeNDVI(sTiffFile, sNDVIFile)
    wasdi.updateProgressPerc(80)

    wasdi.wasdiLog("Adding " + sNDVIFile + " to the workspace")
    # Add the file to the WASDI workspace
    wasdi.addFileToWASDI(sNDVIFile, "NDVI")

    # Create the payload object
    aoPayload = {}
    # Save the inputs that we received
    aoPayload["inputs"] = wasdi.getParametersDict()
    # Save the output we created
    aoPayload["output"] = sNDVIFile
    # Save the payload
    wasdi.setPayload(aoPayload)

    # Close the process setting the status to DONE
    wasdi.updateStatus("DONE", 100)
Welcome to Space, Have fun!